aka {“Error”:”invalid_request” , “error_description” “pc machine id is missing” code : 1021115} – thrown when trying to link a game with Origin from Steam or Epic.
Thanks to Sparta_1ah1 on the EA and Origin forums his suggestion worked after nearly 2 weeks of back and forth trying to figure this out.
The fix?
To quote Sparta directly:
I solved this issue by changing my nickname which i was using some non English letters
what I did is use normal English letters in my steam account nickname and boom problem solved.
In my case – I had symbols in my Steam display name like | and #. Removed these, and off we go.
Hopefully this reaches a few of you who have been banging your head trying to get an answer from EA, Steam or Epic
This project started a few years ago as an idea to convert an existing internet radio from it’s current hardware, to a more powerful and up to date system.
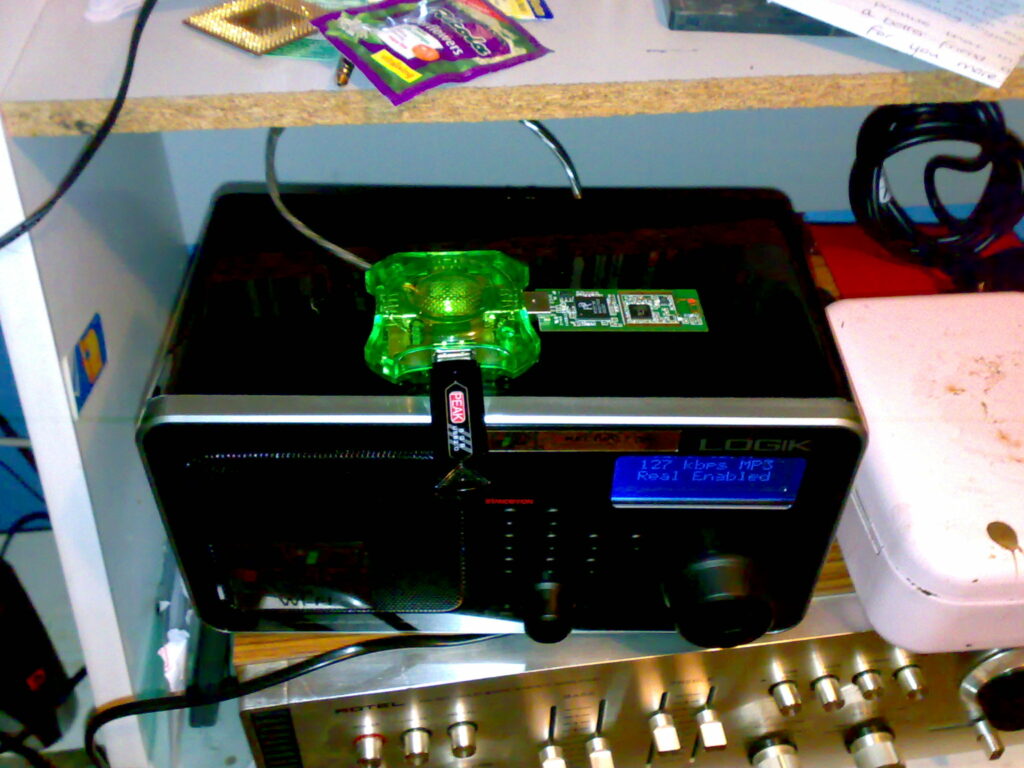
The system in question – A Logik IR100
A prehistoric photo from about 14 years ago of the device a few months after I purchased it and subsequently discovered the secrets within.
This device, not only at the time was actually one of the cheapest version of this radio around, when you tear it down to its parts it’s actually perfect for a Raspberry Pi upgrade.
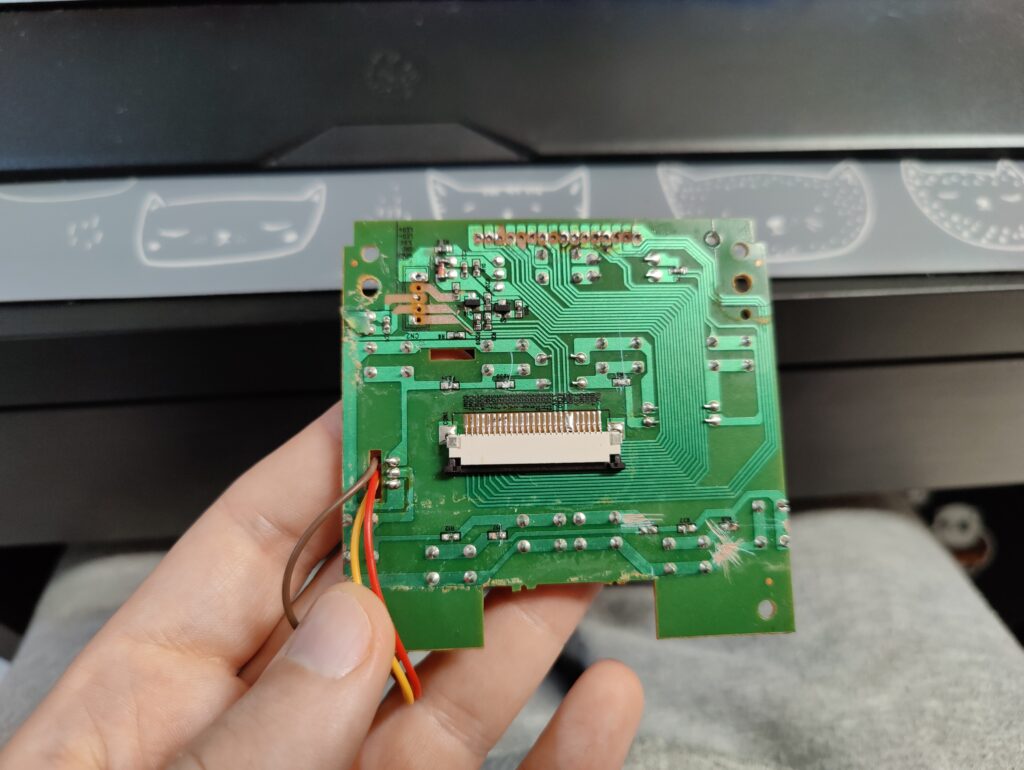
Sadly I don’t have my particular radio with me here right now in Vancouver to show some high quality photos of the internals but you can see a few here – but from my memories of tearing this thing down it had enough buttons for what was needed, an LCD display which looks like a typical parallel Hitachi HD44780 based display, it’s own PSU and amplifier for the speaker.
However, I had one problem. I didn’t know how to write code, or where to start making functions do what they were supposed to. I had no pin out for the display – this was important because the alignment of the pins were slightly different so had to be sure 100% I wasn’t going to nuke it!
The project now
For the moment sadly as I mentioned before this amazing device is currently still sat in a box in storage back at home in the UK so won’t be converted for a while.
However since I started thinking about this project back then, and the struggles of basically mimicking what it did, plus enhancements to bring it up to date I stumbled upon this perfect project:
This has now become the basis for the device I am going to use, and hopefully the final conversion of the Logik once I can get it shipped over.
Thrift Shopping!
Or going to the charity shop for you British lot – Something I never used to find a joy in. Then I was seeing the absolute goodies my Canadian girlfriend was finding here in Vancouver.
To make this project happen and keep with the spirit of conversion and upgrading an already existing piece of hardware it was time to go and raid the shops and see what I could find.
The perfect device?
I went through many ideas in my head as to what I should use…
A clock radio with 4x 7 segment display – get really fancy and make that work along side retro fitting an LCD display of some sort?
Go down the retro route and find the cheapest antique radio that an LCD screen wouldn’t look too out of place, or would comfortably take a large VFD display?
Or find something else that fit the bill?
In the end? I found something else to fit the bill.
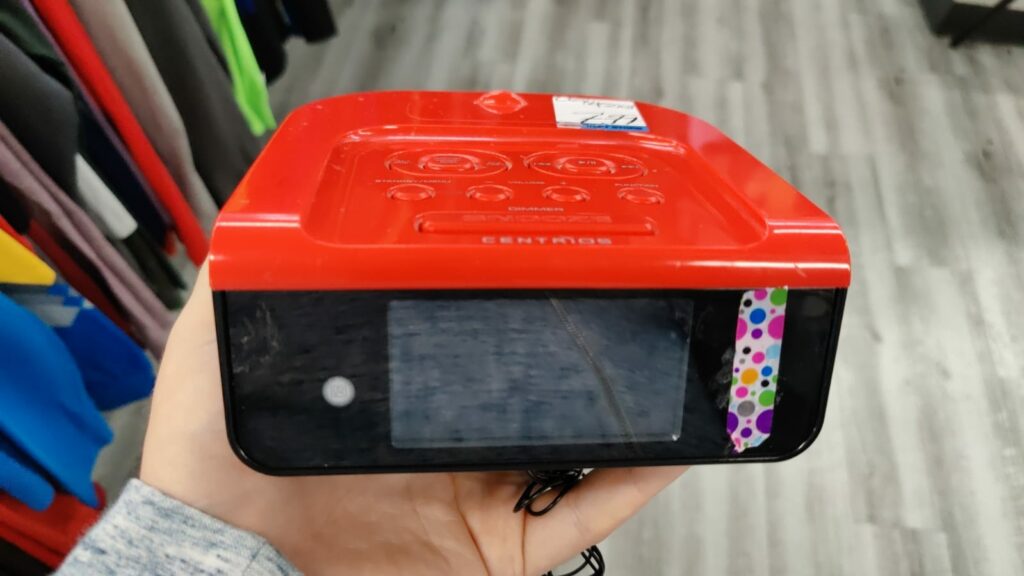
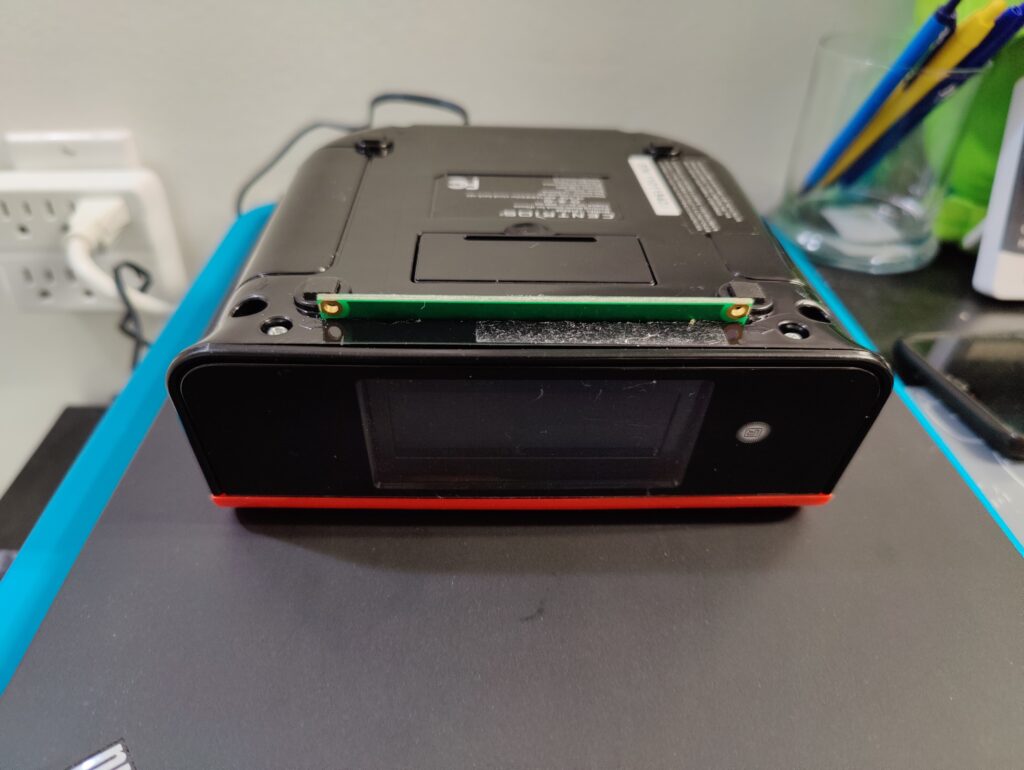
A Centrios iPod dock radio with segment LCD display, and IR.
I found this for $8. Probably paid a little too much considering it didn’t have a remote control or power supply with it. I did try and find them but apparently they grew legs and disappeared.
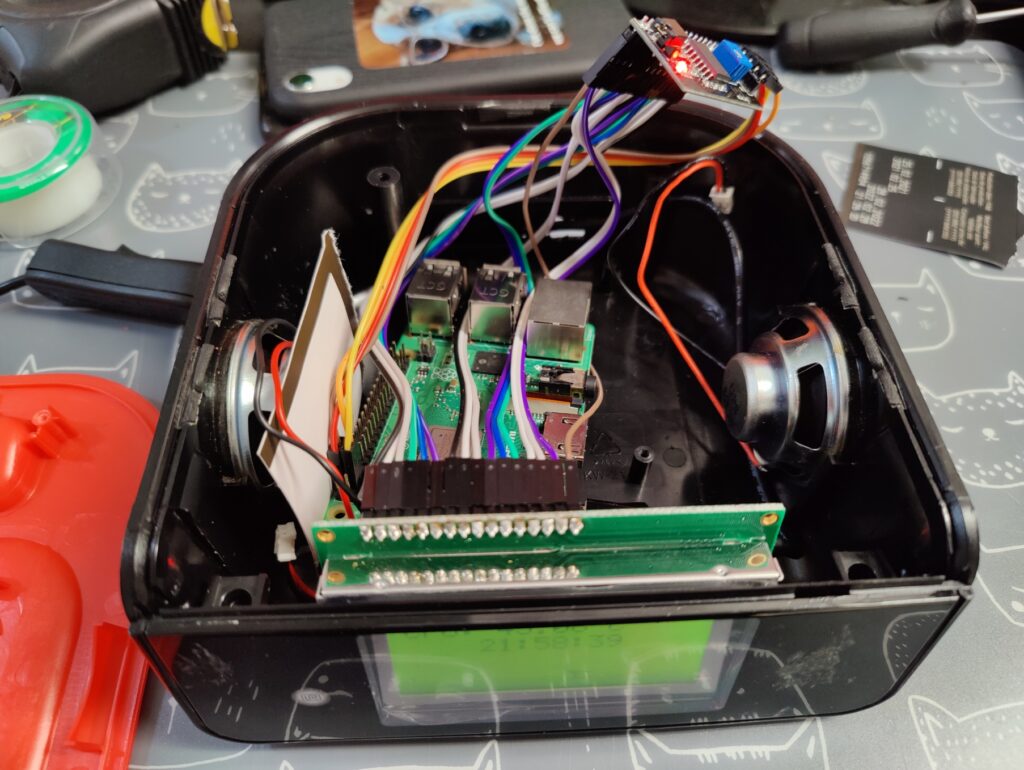
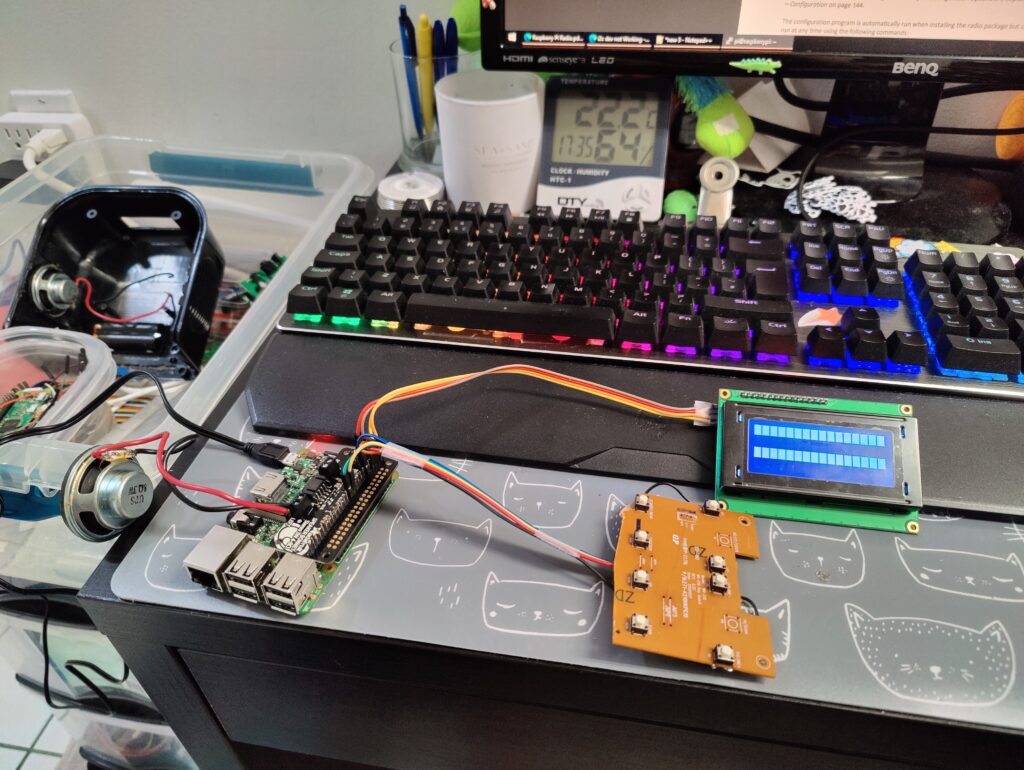
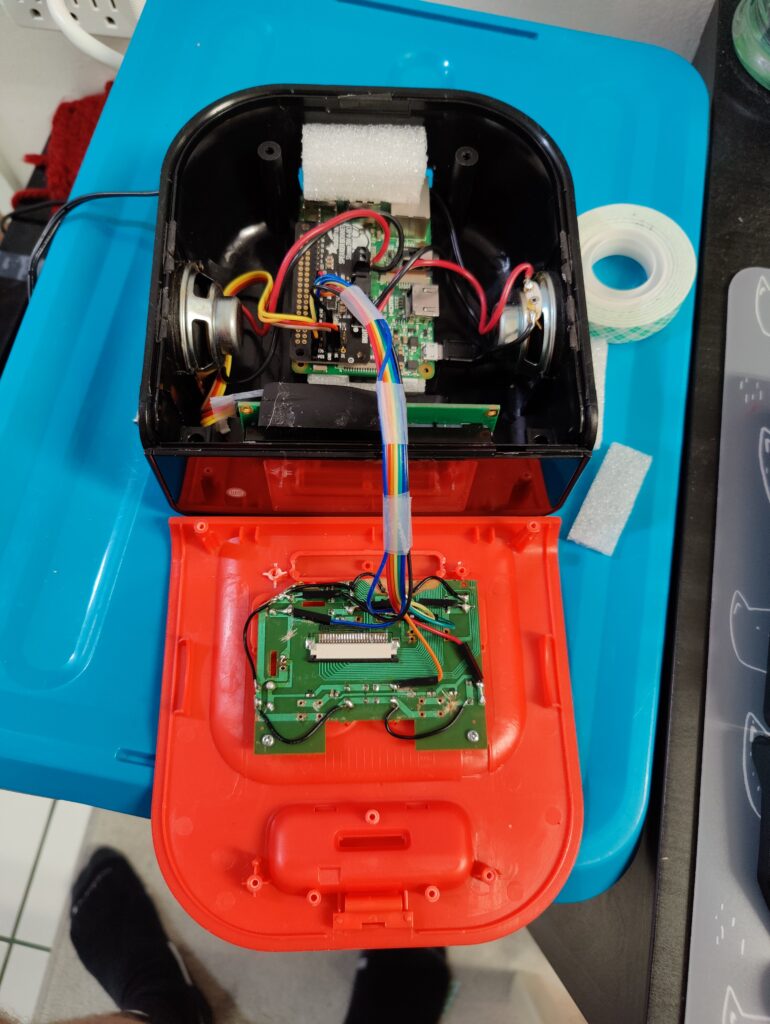
But, it should be perfect. Has useful buttons that can be used for the control of the radio, and the screen cut out is perfect for a 16×4 character LCD, and two 3W 8ohmn speakers. Sadly the amp for the speakers was integral to the mainboard of the existing guts but thankfully Adafruit have a great hat that will accommodate these just fine.
Due to time constraints, shipping and just life the project is still not really complete, however if all goes well I’ll have the finished project by Halloween this year (2021)
Highlights
Below are some pictures of what’s happened with it and where it’s currently at.
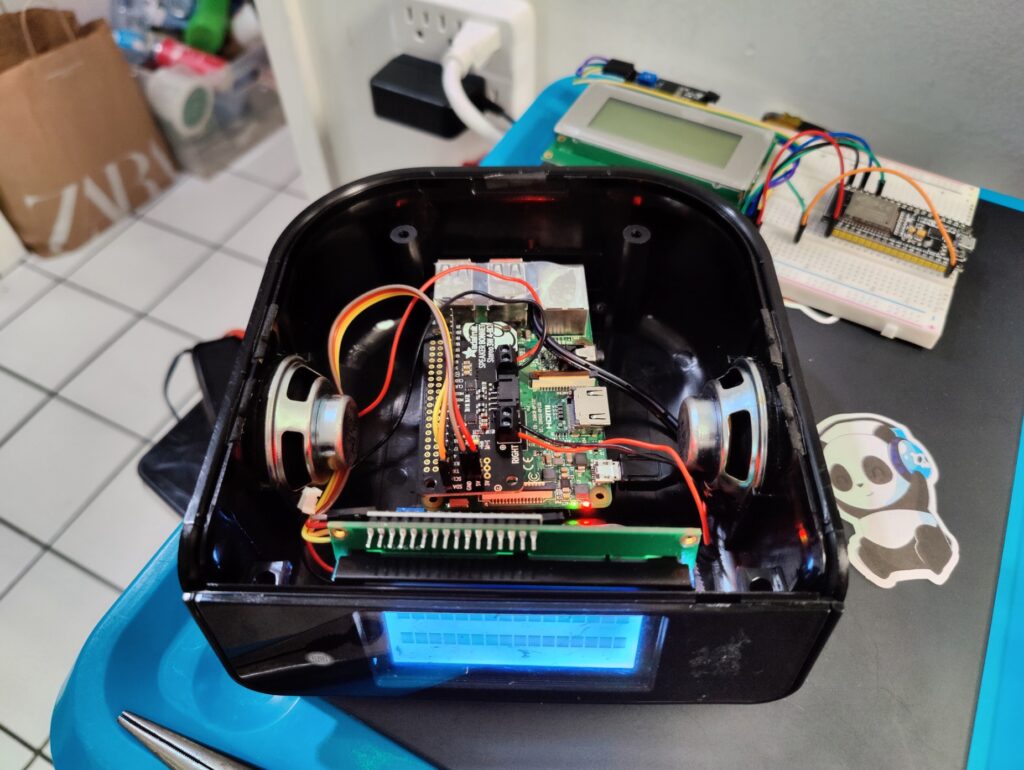
The initial concept test design
Grabbing the bits and pieces I had already from just tinkering I made up a mock idea of what I am expecting, and how parts might fit.
Parts in use here:
Displaytech 164A
Common SPI/I2C to Parallel converter board
Raspberry Pi 3B+
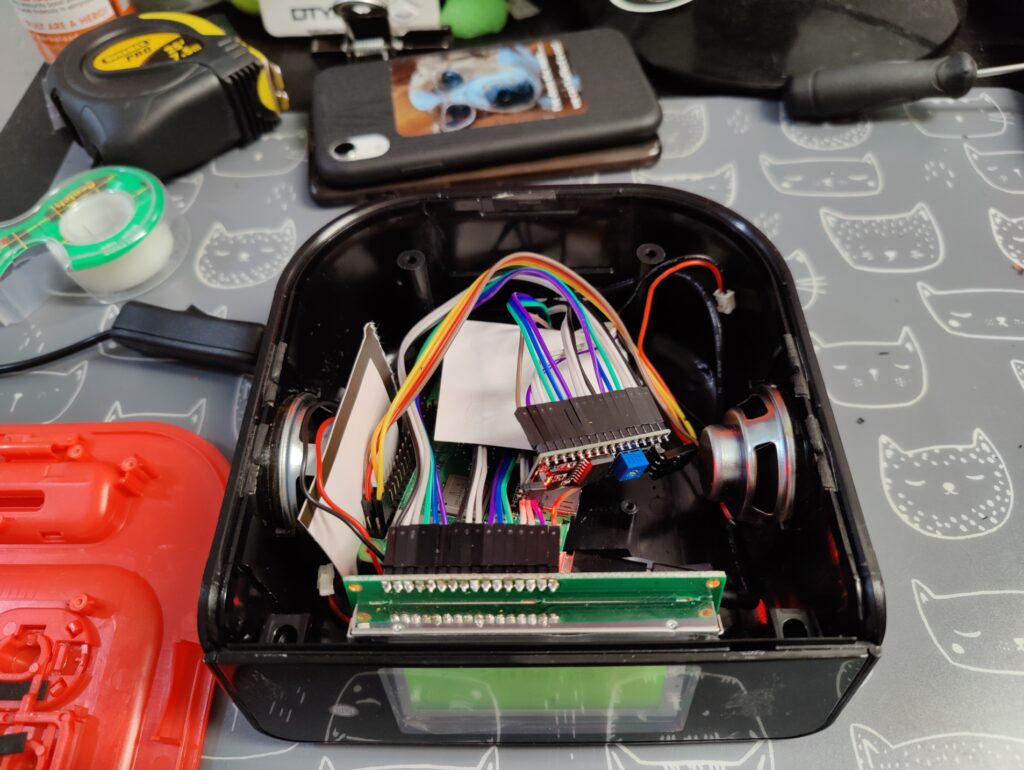
Seems to fit ok, however the LCD isn’t really the colour I would like and unfortunately is a little big for the case. I discovered will be a permanent problem due to the design of the PCBs!
This results in the snooze button needing a little bit of hacking and chopping later on to make it fit. Sadly it will never work again but I also don’t want a gaping hole in it.
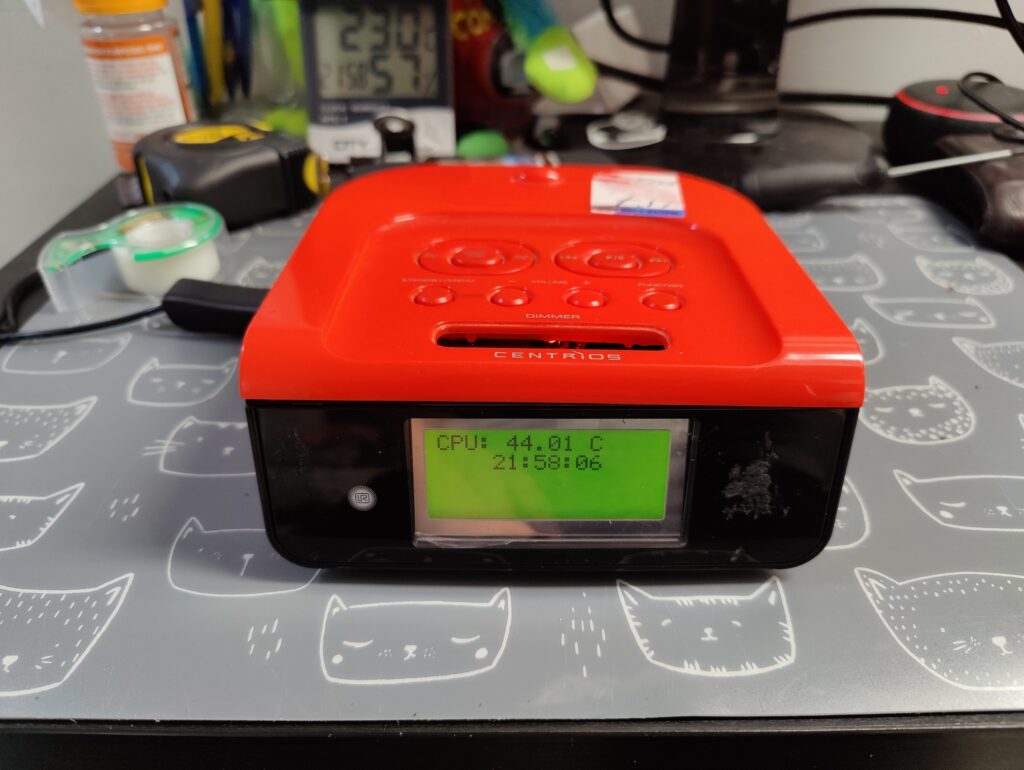
The final design?
I think that this will be the final design. I switched out the 3B for a Zero W initially as it is far smaller, and generates less heat. Yes, I loose the ability for ethernet but the work to increase the hole size on the back, and get it to align nicely is too much for it to go wrong. But further testing shows that for the internet radio software to run well a bit more grunt is needed from the 3B.
Adafruit Speaker Bonnet now installed, and potentially looking to maybe retro-fit a USB-A to Micro-B breakout panel, and Micro-B to Micro-B breakout panel to the back as this maybe an easier feat (and neater)
Next stage is to wire the buttons!
Buttons!
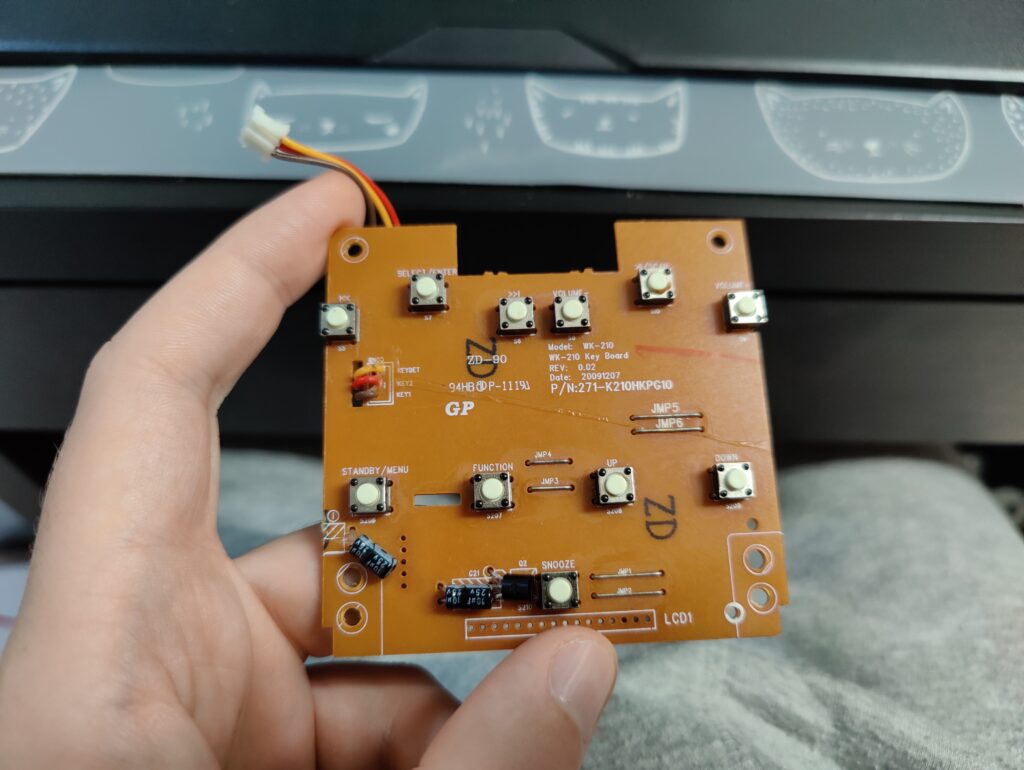
This part was a challenge, and when if I was to build this project again this part will be something to improve.
The buttons are actually a part of the original radio device and looking at the way they were originally wired could have been easily an SPI device as opposed to just pure GPIO as we’re going to be using.
The board needed to be butchered to remove the resistors and links between the buttons. I also need to make the board shorter as the current snooze button sits directly on top of the LCD and means that the case will not close properly.
As you can see that process has already begun!
Button board from the original radio
Button Testing
With the resistors gone, the links broken, the board shortened (that almost ended in epic failure) and the new wires connected it was time to test out my handy work!
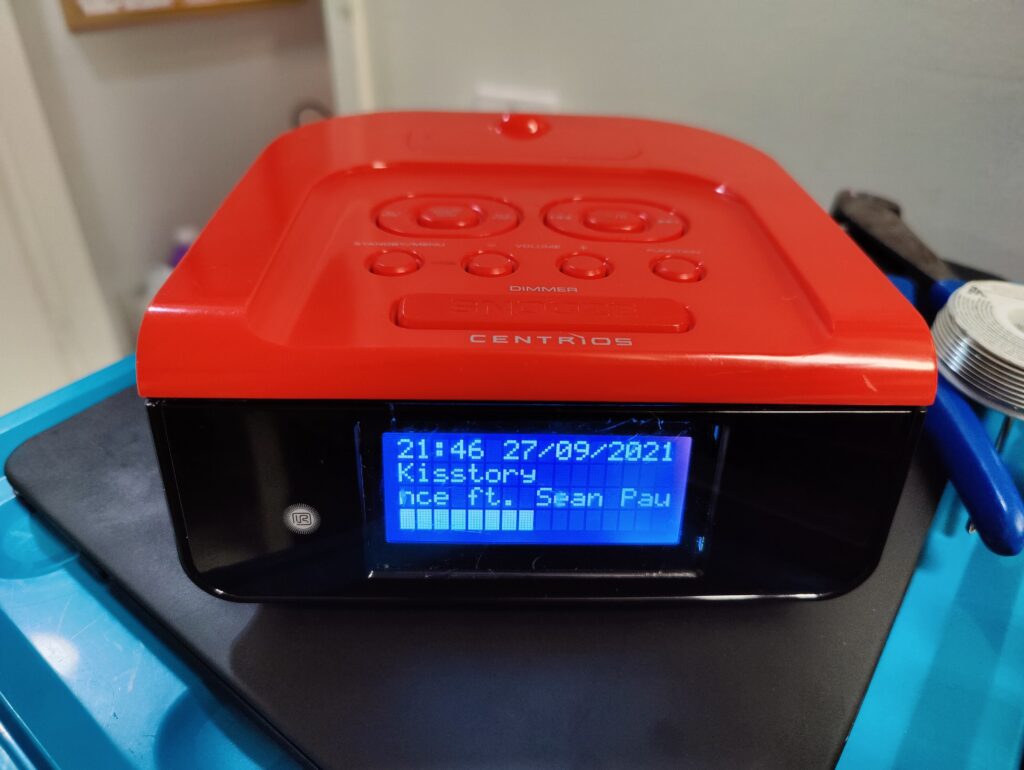
Complete!
With a slight tweak of the button wiring, and that passing the test it was time to put it together.
AIM Electrisol Lead-Free Rosin Core Solder (although, I’m sure some of the solder used in the original radio is leaded – Not sure if ROHS was a thing then here in Canada!)
Remarks
This was a fun project to do. There are things I would do differently, and mistakes made. But then when isn’t there things to reflect on?
There are certainly a few software bug issues with the Adafruit that need to be figured out too but hopefully I can figure those out and shall pass those fixes onto Bob Rathbone to verify and add to his project as they directly impact it.
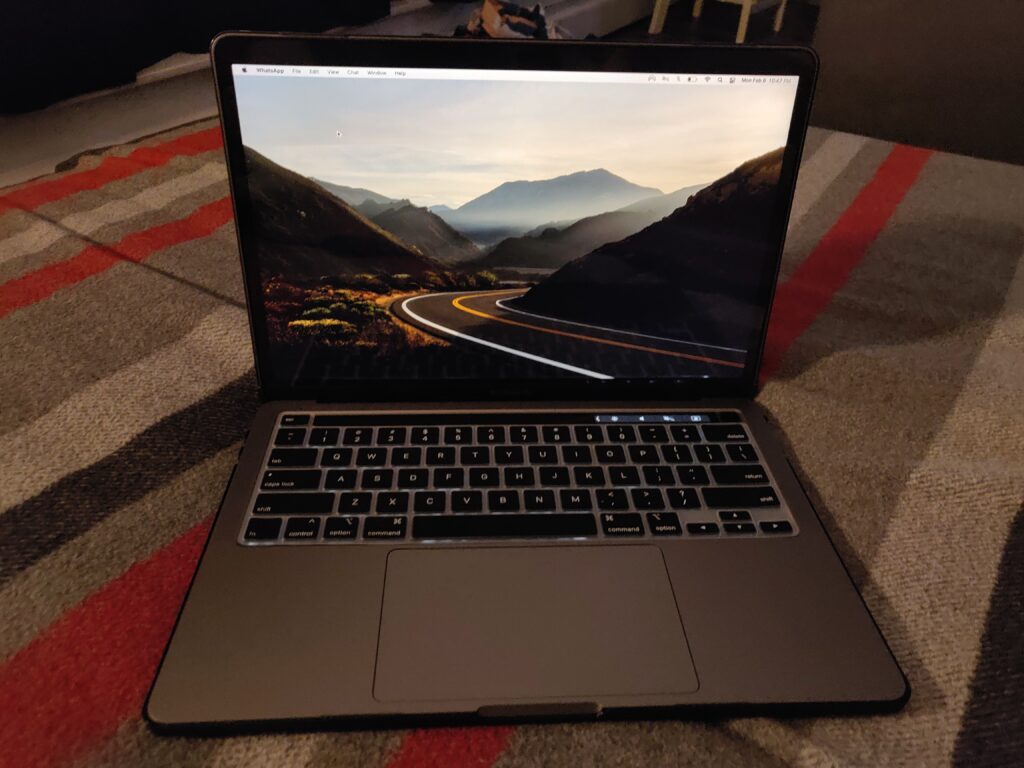
I recently went and bought a base model Pro M1 as my 2013 Air is now on it’s third battery in less than 2 years thanks to ebay. My 2012 pro which I use for djing is starting to show it’s age however this computer won’t replace it unless either a mircle happens and bars open again as it is still functional. Also the M1 Air was sold out, no biggy because I actually when I come to think of it perfer the Pro in many ways.
Either way, it wasn’t a wasted purchase as I work for a managed service provider and it’s good to get ahead of the curve because clients will start buying M1 stuff and I am considered the Mac guru in the office so might as well keep that crown.
My thoughts? Mind. Blown. I knew ARM was getting pretty good in phones, but I really underestimated how these CPUs are compared with it’s x86_64 counterparts. ARM is in everything from your router to your toaster and probably lightbulbs so I’m thinking well it can’t be all that great and how can you compare ARM to Intel etc… How wrong I was.
The speed of these things just unzipping a file, booting up and even emulating 64-bit Intel is just insane. I even had the scenario of ARM emulating Intel emulating a Motorola 68000 based Amiga 500. As a DJ I had to also try out Pioneer’s newly released M1 drivers, and installed Serato DJ which is Intel and no where near supported. Guess what? Absolutely pooed over my 2012 in everyway.
My biggest fear? It does not get supported for as long, or last as long as my old Intel Macs. The “soldered” nature does make me sad because if something does fail you can’t replace it like you could with the 2012 RAM and HDD/SSD and the 2013 Air SSD but overall reliability hasn’t been an issue for me.
So it would appear yet another botched update has been kicked out the door of Microsoft, but this time it includes a Adobe Flash Player update?
Been suffering a lot of driver resets, and blue screens recently with a new AMD Ryzen based machine and AMD Vega graphics. Initially I thought it was due to KB4549951 as this has been reported to be causing blue screens and other crashing issues. Nope! Even after uninstallation the problem persisted. So I moved onto the next update to uninstall… KB4537759.
Rebooted, and the problem went away. Installed the update again, and rebooted suddenly on start up the screen flickers, may recover but so far on every time it’s reinstalled itself we’ve had a blue screen of death straight after the initial reboot.
I’ve even tried newer drivers, and rebuilding the machine from scratch and the problem remains with this KB.
So conclusion: Uninstall KB4537759 if you’re having issues with your AMD drivers!
Seems this update lists a fix for the WINSPOOL.DRV issue mentioned in my previous post:
Addresses an issue that causes winspool.drv to stop working and generates the error 0xc0000005 when users attempt to print from certain client applications.
Update, April 8th 2020: Several comments posted below on this issue all saying that this has proven to resolve it for them. Interestingly also reporting similar scenarios where only certain environments are being affected if they are support multiple different environments. Sadly my role as a technician at an MSP rather than being an internal type IT guy doesn’t allow for me to dig deeper on this one. Logic would say that maybe something with a particular printer driver causes this but due to the lack of information presented with the crash it would be hard to say that this is a definite cause.
One of my side hobbies along side fixing anything that has a plug is playing DJ in night clubs and bars.
I often find myself browsing DJ groups on social media and seeing posts about other DJs looking to source a new laptop and the age old arguments over whether you should spend a little, or spend a lot and whether you should go with a Windows computer or Apple MacOS computer.
But something else caught my eye when looking at some of the suggestions. The price gap between a second hand laptop, a new laptop and the outrageous prices being charged for hardware that is clearly very dated.
NewEgg is a fine example of a retailer and it’s sellers playing on technical inability and lack of understanding of computer specs.
For around $440-445 Canadian, what do you get? A 6th Gen (Q3 2015), a 4th Gen (Q2 2014) and a 2nd Gen (Q1 2011) all with very similar solid state storage sizes. Where is the logic in this when you compare the brands, the age and certainly the benchmarks?
Looking at the various benchmark sites, and comparisons of spec’s the 6300U vs the 2520M – There is a big difference between these two. Across the board the 6300U is about 20% faster in all areas, and has a far lower TDP at 15W vs 35W, meaning battery life and performance be far better.
When you compare the 6300U and the 4210M on the benchmarks they are pretty much identical however the memory speed supported on the 6300U is far faster, and the TDP again is far lower with the 4210M being rated at 37W.
For just a mere $200 more (granted they’re currently on sale, and budgets don’t always stretch!) you can jump up to the latest 10th Generation processors or 8th generation. Again some outrageous pricing between generations! That said the jump from 8th to 10th generation comes with a mix of opinions.
I have been a WordPress user for many years on and off for various websites and it’s been one of the best CMS based website engines I’ve had the pleasure to use.
My knowledge, and use has been very minimal but functional.
They have taken writing a blog to the next level it seems in Version 5 with this new “Blocks” feature. So far my impressions are that it is a very welcomed change for me. Being able to insert different content without having to fight the WYSIWYG to align images and other bits of content moving around or causing other weirdness is bliss!
** Post will be updated later with some screenshots when I have access to the device again. Sleep mode kicked in! **
Recently I was trying to get access to my Synology DS1812+ NAS as this contains a lot of important data relating to my life. This thing currently still resides within the UK until I am certain that my life in Canada is firm.
However, what’s the best way to connect this device for access abroad? I know, we’ll connect it directly to my pfSense firewall that runs on my rather slow by today’s standard Telus connection (20 down, 1 up!?)
I thought, ah great should be fairly simple right? Synology DSM has an OpenVPN client, pfSense is able to export configurations, and the root CA certificate (um why Synology do we need this?) for Synology to import. Easy! Or not as the case maybe.
Uploading the configuration file without any modification generates an error – “Invalid Parameters”. Through much trial and error I eventually got it to accept a configuration file.
The cause? This line:
ncp-ciphers AES-128-GCM
For some reason, the built in OpenVPN client doesn’t seem to like this. Removing this line solved the error, and I was able to connect successfully from any client on my LAN to the device.