How this project started
This project started a few years ago as an idea to convert an existing internet radio from it’s current hardware, to a more powerful and up to date system.
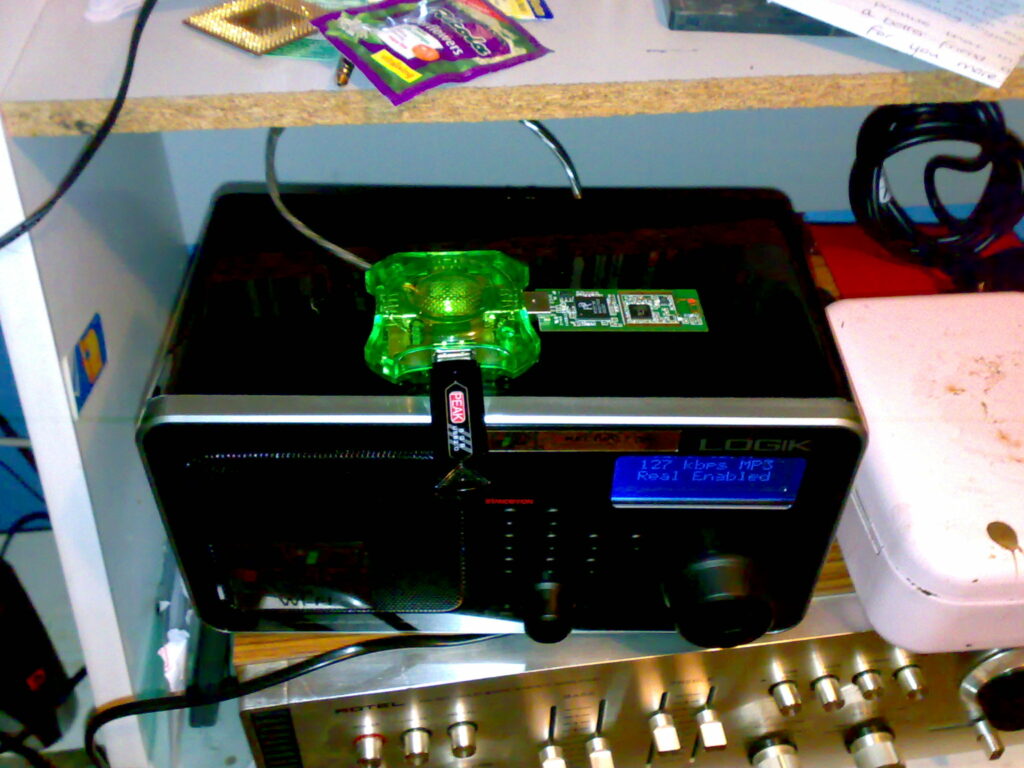
The system in question – A Logik IR100
For a little background on this radio, check out this page (now only available from the wayback machine) – My Logik IR100 Internet Radio Resource page (archive.org)
And this page for the reasoning behind the USB hub, naked USB wifi dongle and at the time £80 8GB memory stick – My Logik IR100 Internet Radio Resource page (archive.org)
Why this device?
This device, not only at the time was actually one of the cheapest version of this radio around, when you tear it down to its parts it’s actually perfect for a Raspberry Pi upgrade.
Sadly I don’t have my particular radio with me here right now in Vancouver to show some high quality photos of the internals but you can see a few here – but from my memories of tearing this thing down it had enough buttons for what was needed, an LCD display which looks like a typical parallel Hitachi HD44780 based display, it’s own PSU and amplifier for the speaker.
However, I had one problem. I didn’t know how to write code, or where to start making functions do what they were supposed to. I had no pin out for the display – this was important because the alignment of the pins were slightly different so had to be sure 100% I wasn’t going to nuke it!
The project now
For the moment sadly as I mentioned before this amazing device is currently still sat in a box in storage back at home in the UK so won’t be converted for a while.
However since I started thinking about this project back then, and the struggles of basically mimicking what it did, plus enhancements to bring it up to date I stumbled upon this perfect project:
Raspberry Pi Internet Radio (bobrathbone.com)
This has now become the basis for the device I am going to use, and hopefully the final conversion of the Logik once I can get it shipped over.
Thrift Shopping!
Or going to the charity shop for you British lot – Something I never used to find a joy in. Then I was seeing the absolute goodies my Canadian girlfriend was finding here in Vancouver.
To make this project happen and keep with the spirit of conversion and upgrading an already existing piece of hardware it was time to go and raid the shops and see what I could find.
The perfect device?
I went through many ideas in my head as to what I should use…
- A clock radio with 4x 7 segment display – get really fancy and make that work along side retro fitting an LCD display of some sort?
- Go down the retro route and find the cheapest antique radio that an LCD screen wouldn’t look too out of place, or would comfortably take a large VFD display?
- Or find something else that fit the bill?
In the end? I found something else to fit the bill.
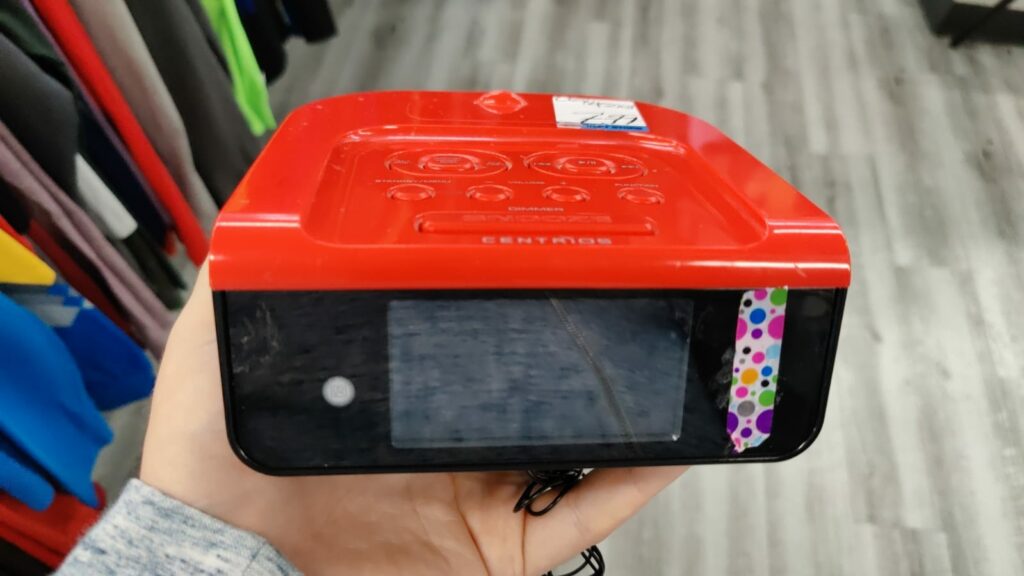
I found this for $8. Probably paid a little too much considering it didn’t have a remote control or power supply with it. I did try and find them but apparently they grew legs and disappeared.
But, it should be perfect. Has useful buttons that can be used for the control of the radio, and the screen cut out is perfect for a 16×4 character LCD, and two 3W 8ohmn speakers. Sadly the amp for the speakers was integral to the mainboard of the existing guts but thankfully Adafruit have a great hat that will accommodate these just fine.

Current project status
Due to time constraints, shipping and just life the project is still not really complete, however if all goes well I’ll have the finished project by Halloween this year (2021)
Highlights
Below are some pictures of what’s happened with it and where it’s currently at.
The initial concept test design
Grabbing the bits and pieces I had already from just tinkering I made up a mock idea of what I am expecting, and how parts might fit.
Parts in use here:
- Displaytech 164A
- Common SPI/I2C to Parallel converter board
- Raspberry Pi 3B+
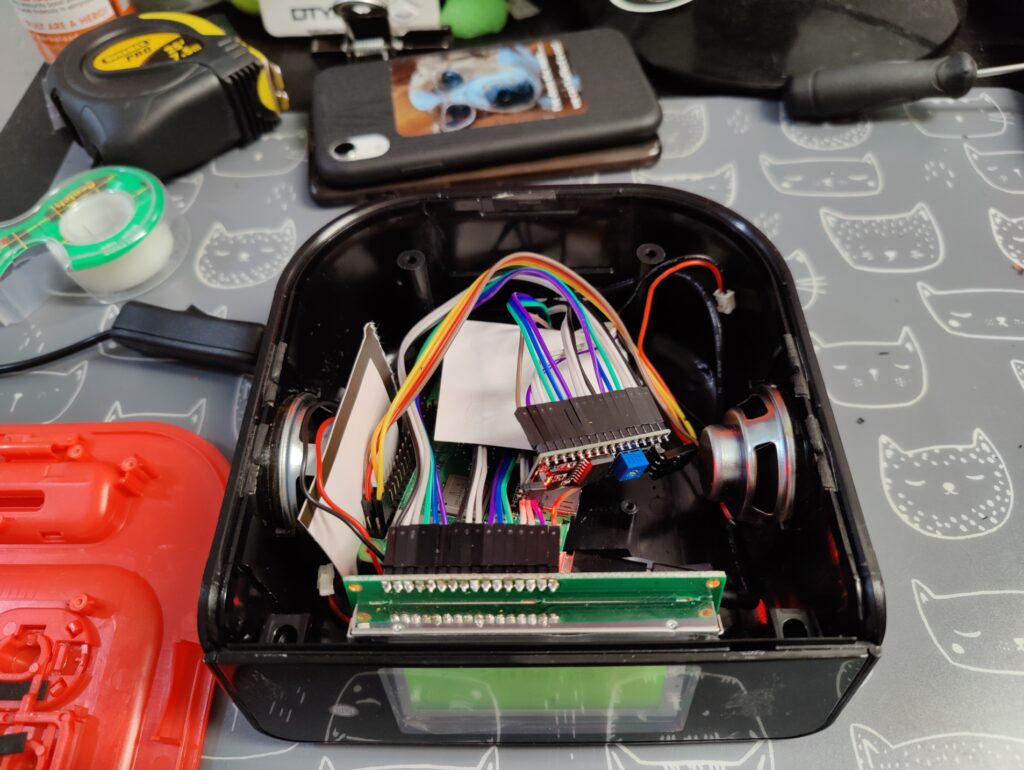
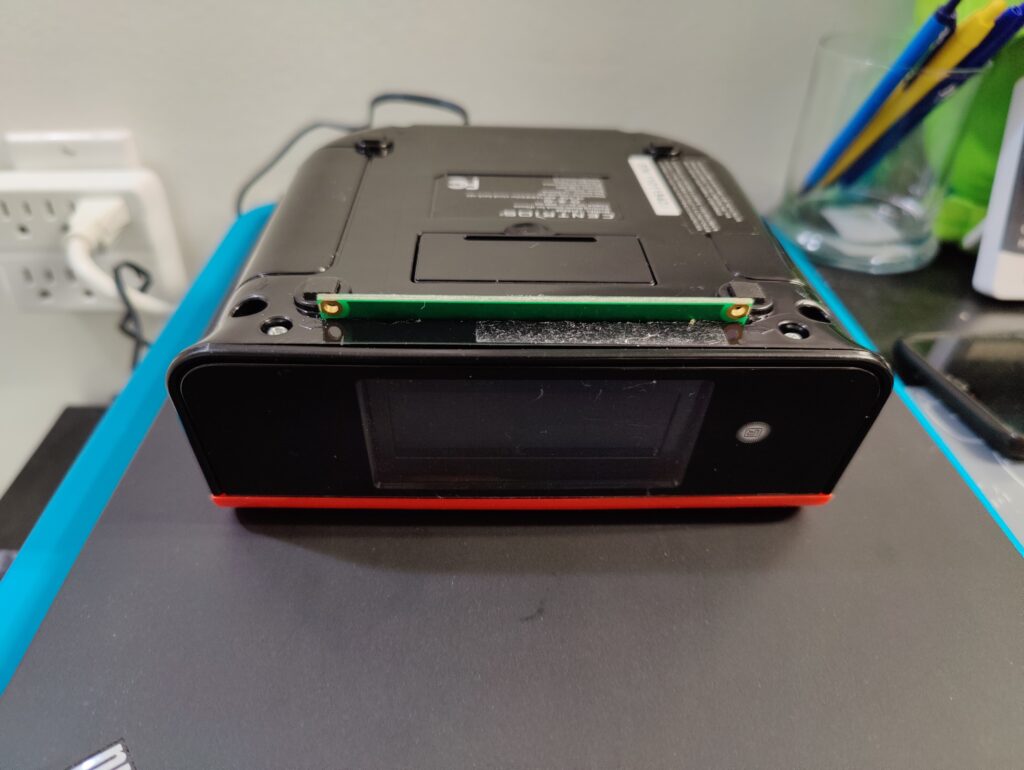
Seems to fit ok, however the LCD isn’t really the colour I would like and unfortunately is a little big for the case. I discovered will be a permanent problem due to the design of the PCBs!
This results in the snooze button needing a little bit of hacking and chopping later on to make it fit. Sadly it will never work again but I also don’t want a gaping hole in it.
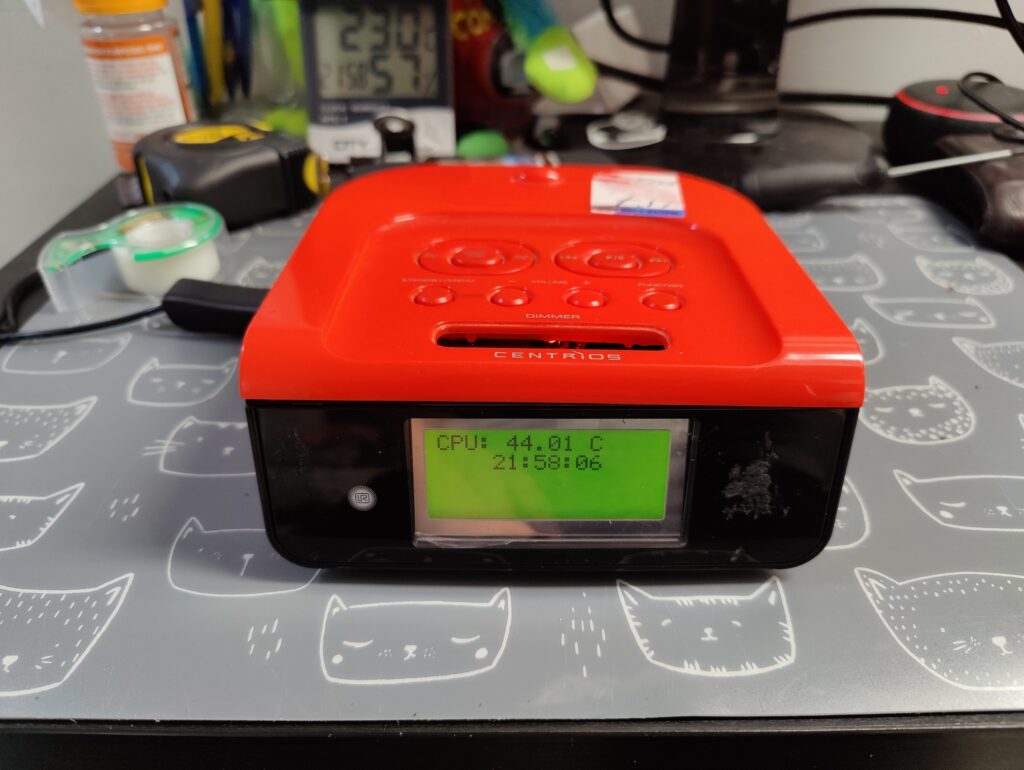
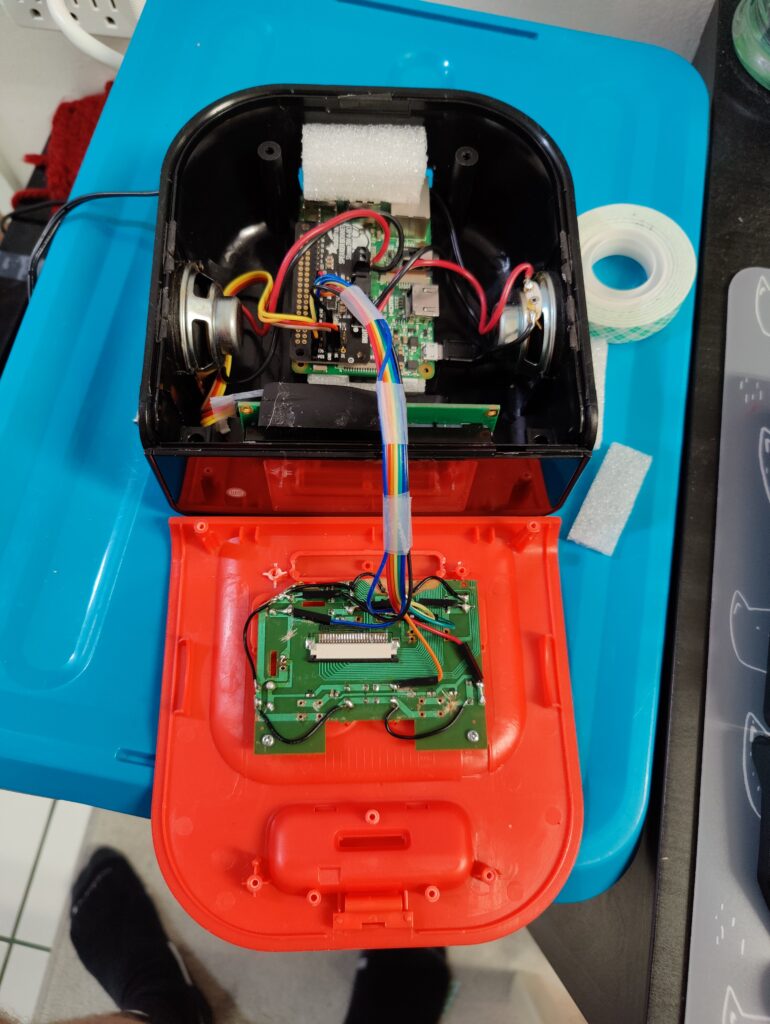
The final design?
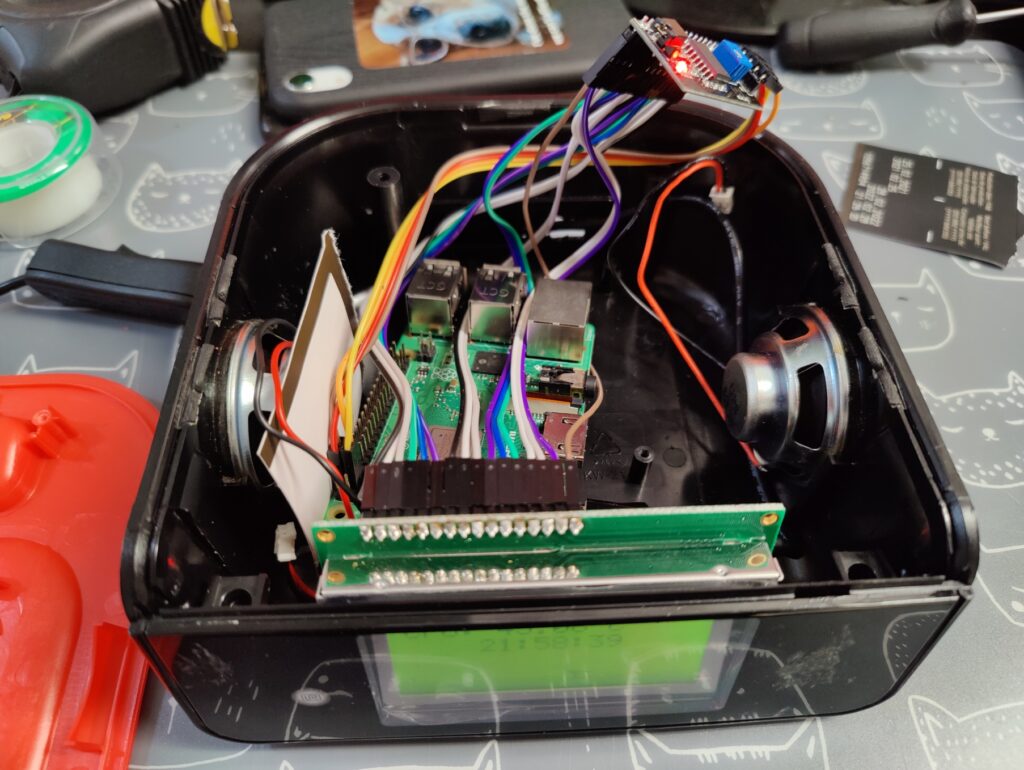
I think that this will be the final design. I switched out the 3B for a Zero W initially as it is far smaller, and generates less heat. Yes, I loose the ability for ethernet but the work to increase the hole size on the back, and get it to align nicely is too much for it to go wrong. But further testing shows that for the internet radio software to run well a bit more grunt is needed from the 3B.
Adafruit Speaker Bonnet now installed, and potentially looking to maybe retro-fit a USB-A to Micro-B breakout panel, and Micro-B to Micro-B breakout panel to the back as this maybe an easier feat (and neater)
Next stage is to wire the buttons!
Buttons!
This part was a challenge, and when if I was to build this project again this part will be something to improve.
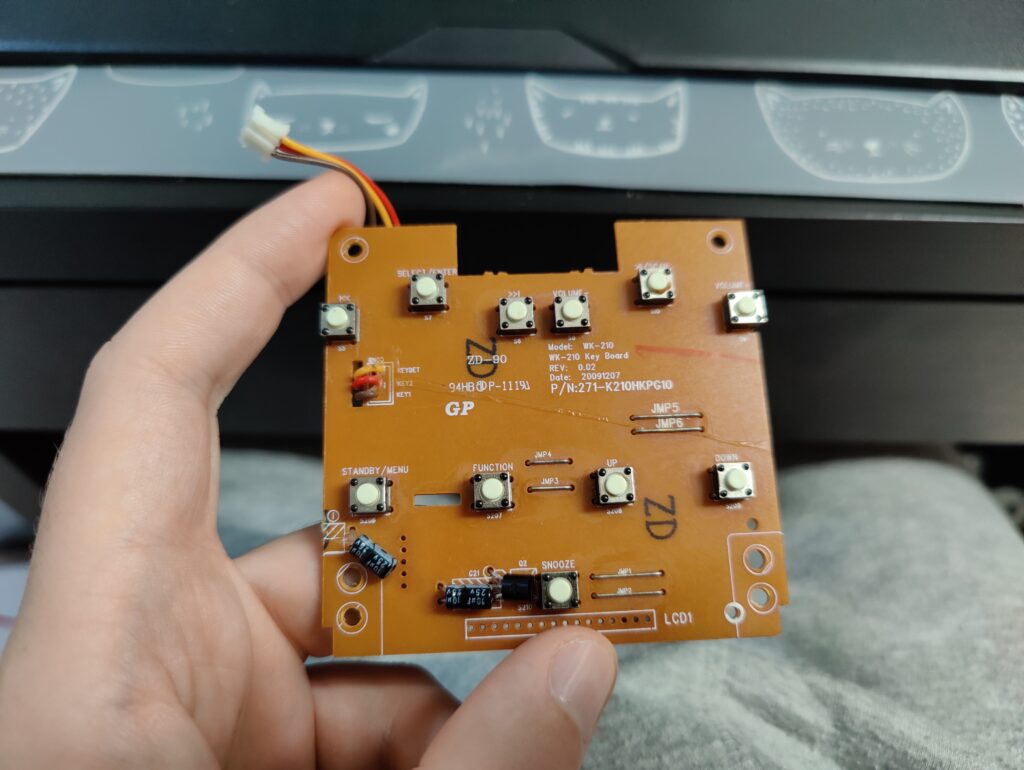
The buttons are actually a part of the original radio device and looking at the way they were originally wired could have been easily an SPI device as opposed to just pure GPIO as we’re going to be using.
The board needed to be butchered to remove the resistors and links between the buttons. I also need to make the board shorter as the current snooze button sits directly on top of the LCD and means that the case will not close properly.
As you can see that process has already begun!
Button Testing
With the resistors gone, the links broken, the board shortened (that almost ended in epic failure) and the new wires connected it was time to test out my handy work!
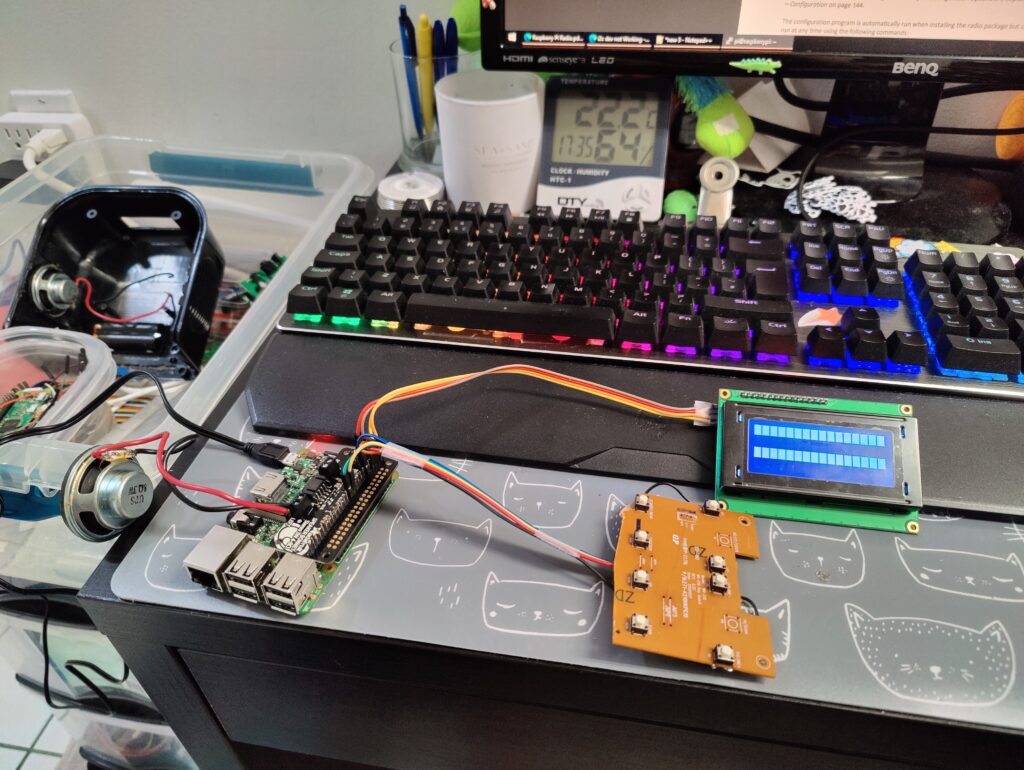
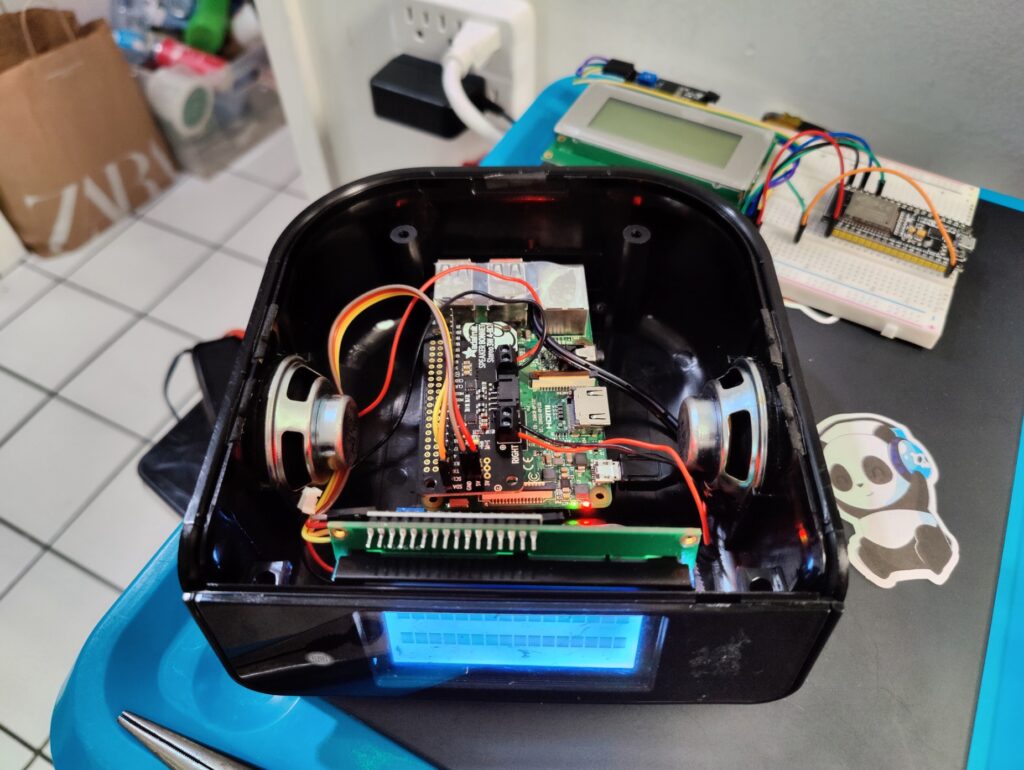
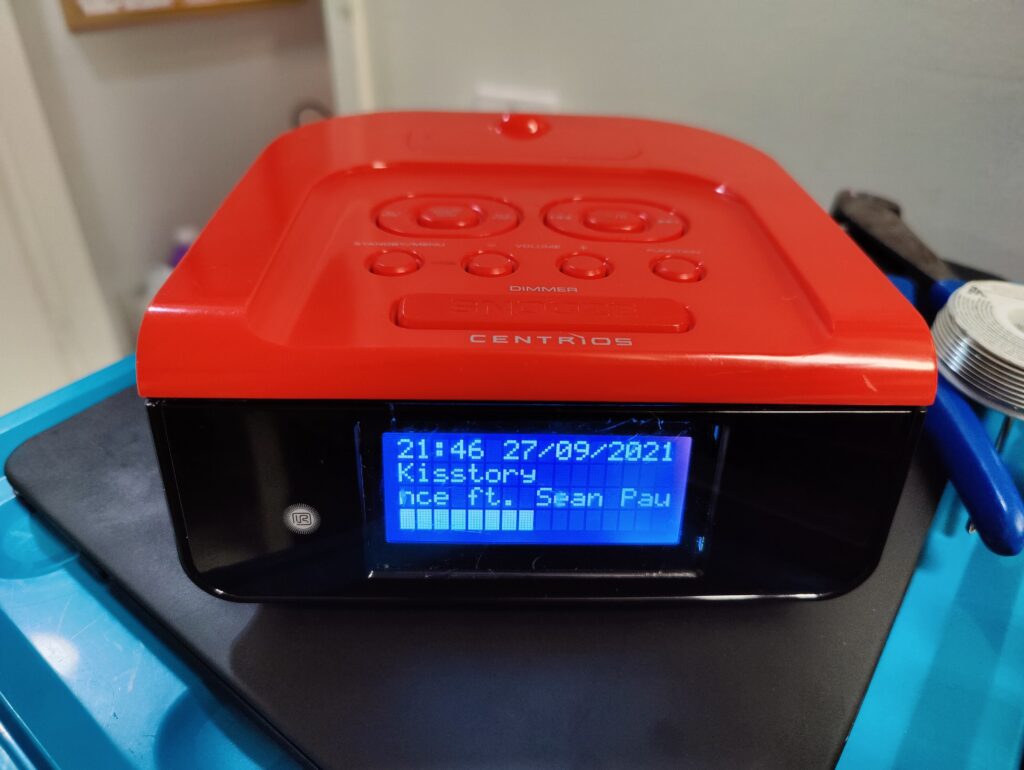
Complete!
With a slight tweak of the button wiring, and that passing the test it was time to put it together.
Here is the final piece!

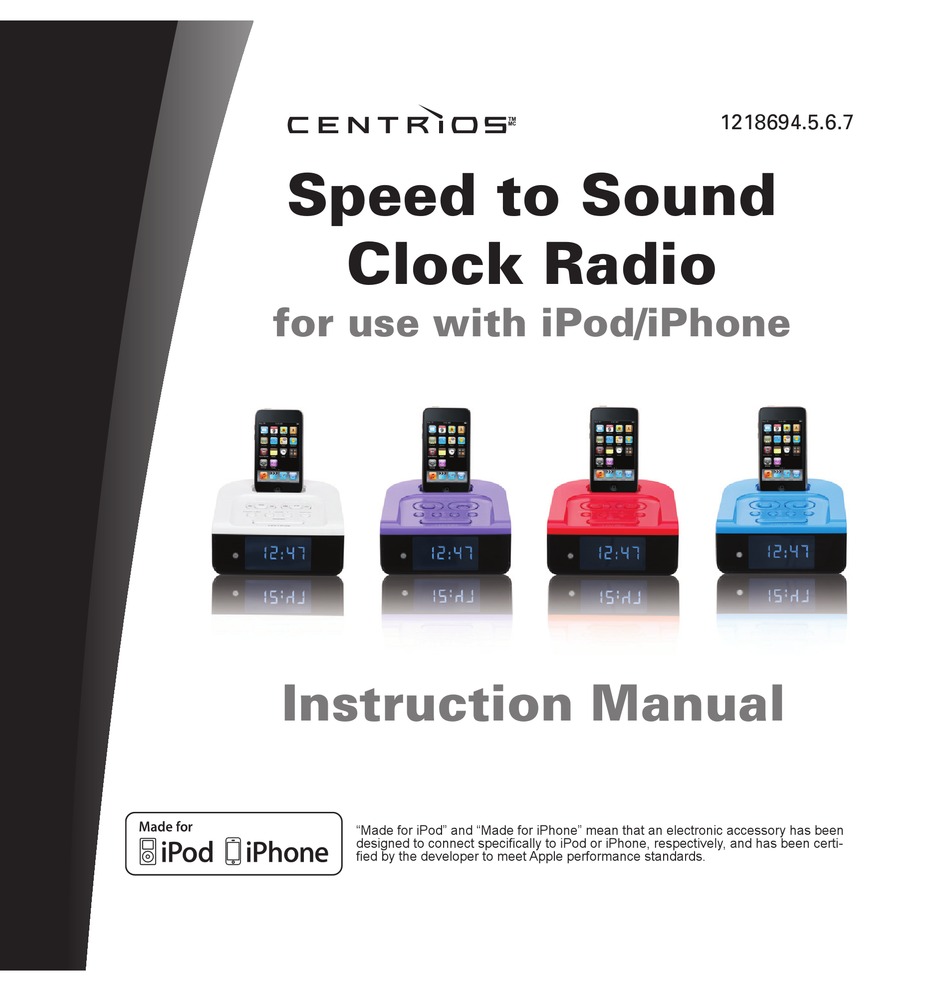
Final Tools and Parts Summary
- Centrios 1218694- iPod dock clock radio
- Raspberry Pi 3B
- Adafruit speaker bonnet
- Raspberry Pi 2.4A, 5.1V power supply
- Black IIC/I2C/TWI Character 16×4 Serial LCD Module
- Mastercraft Solder Station
- AIM Electrisol Lead-Free Rosin Core Solder (although, I’m sure some of the solder used in the original radio is leaded – Not sure if ROHS was a thing then here in Canada!)
Remarks
This was a fun project to do. There are things I would do differently, and mistakes made. But then when isn’t there things to reflect on?
There are certainly a few software bug issues with the Adafruit that need to be figured out too but hopefully I can figure those out and shall pass those fixes onto Bob Rathbone to verify and add to his project as they directly impact it.